DaVinci Resolve: Learning the Interfaces
DaVinci Resolve is a very powerful open-source video editing program. Its strength lies in its segmented workflow, allowing the user to work on the project in stages from beginning to completion. The variety of different interfaces the program presents you with may be daunting and confusing at first, but it gives you different opportunities to change the interface to suit your needs. In this tutorial, I will show you the different interfaces for each “stage” of post-production; then I will demonstrate how to customize those given interfaces.
If you don’t already have DaVinci Resolve, you can download the program for free here.
The Basics
Media Menu
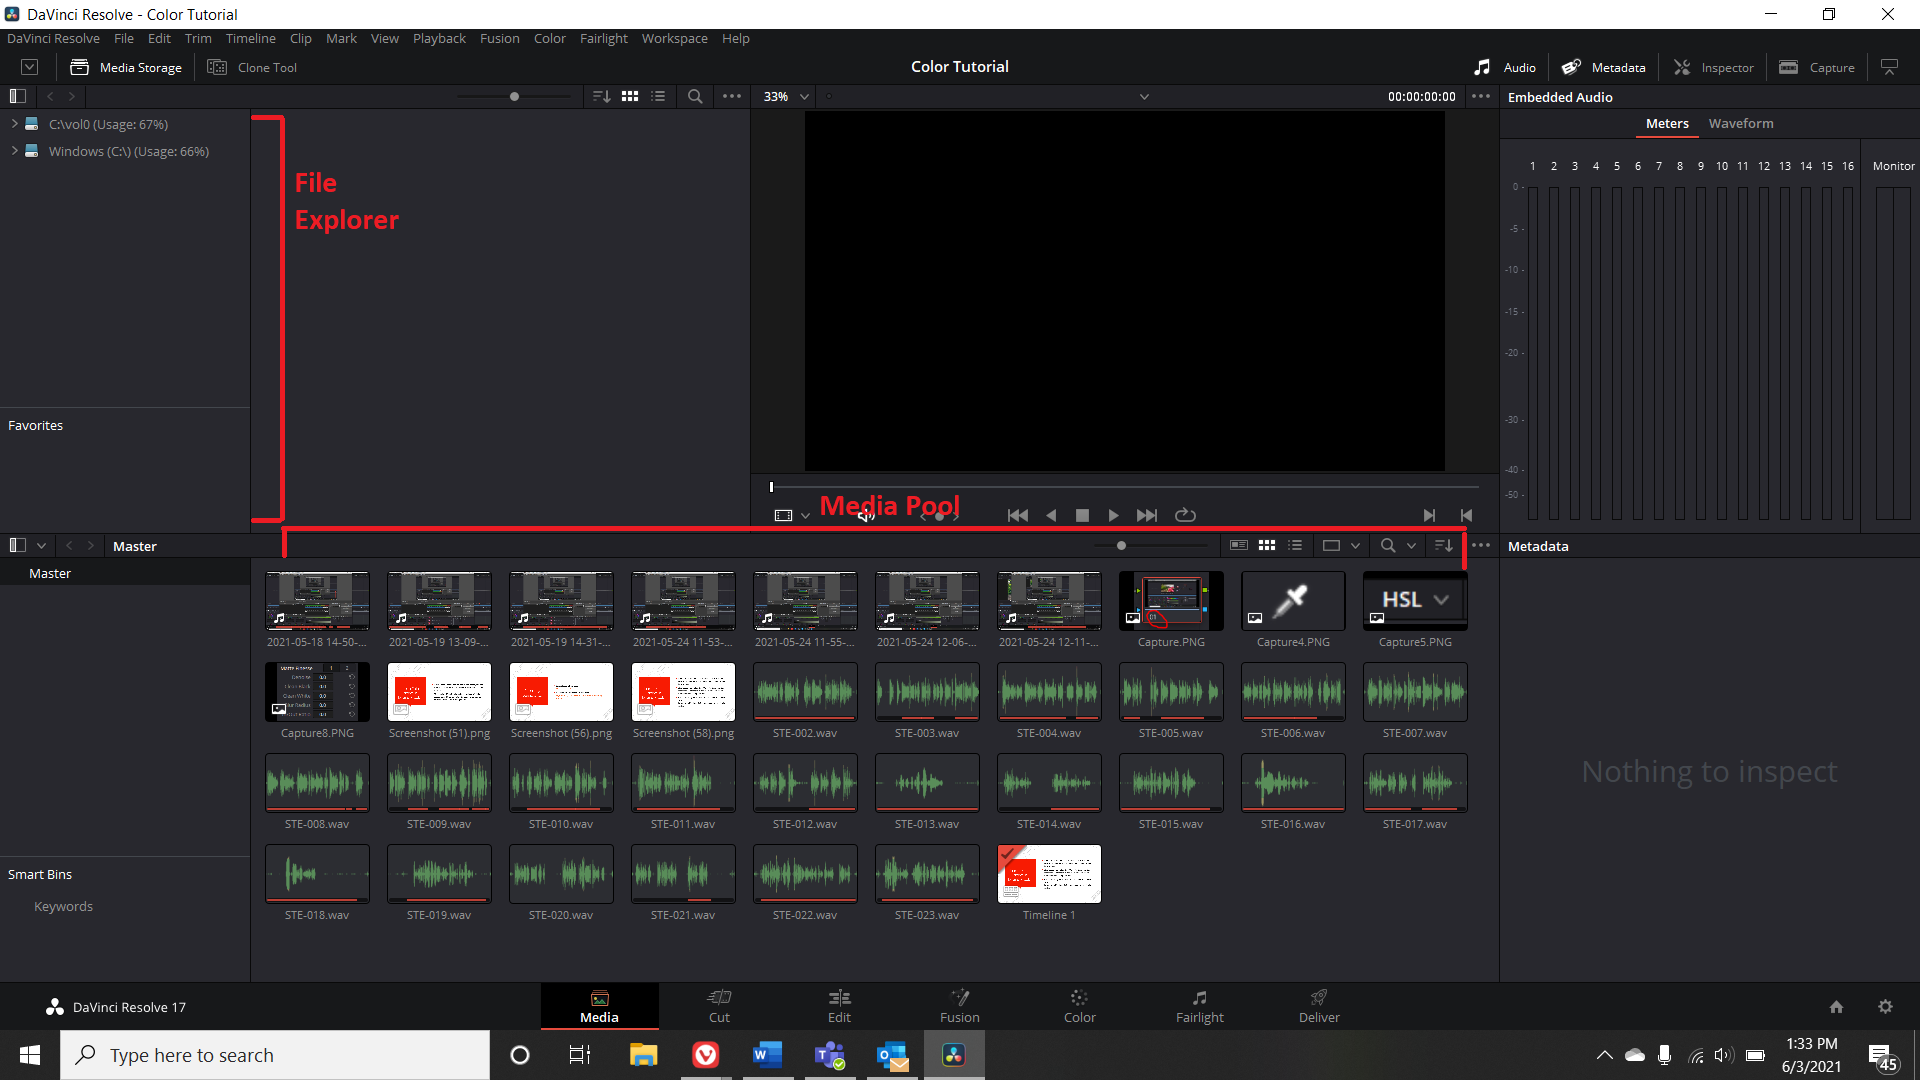
The first stage of post-production is assembling your project files. In the file explorer, it is important to keep all of the files you plan to use in your project in the same directory. From that directory, you can import you files by right-clicking and selecting “Add Into Media Pool” or by dragging it into the media pool (the bottom panel). You can also drag your files from the Windows File Explorer to the Media Pool. In the middle-center of the interface is the preview panel, where you can preview a file before importing it. On the right side is an audio panel, which provides equalizer and waveform representations of audio levels, and the metadata panel, which includes embedded information about the file.
Cut Menu
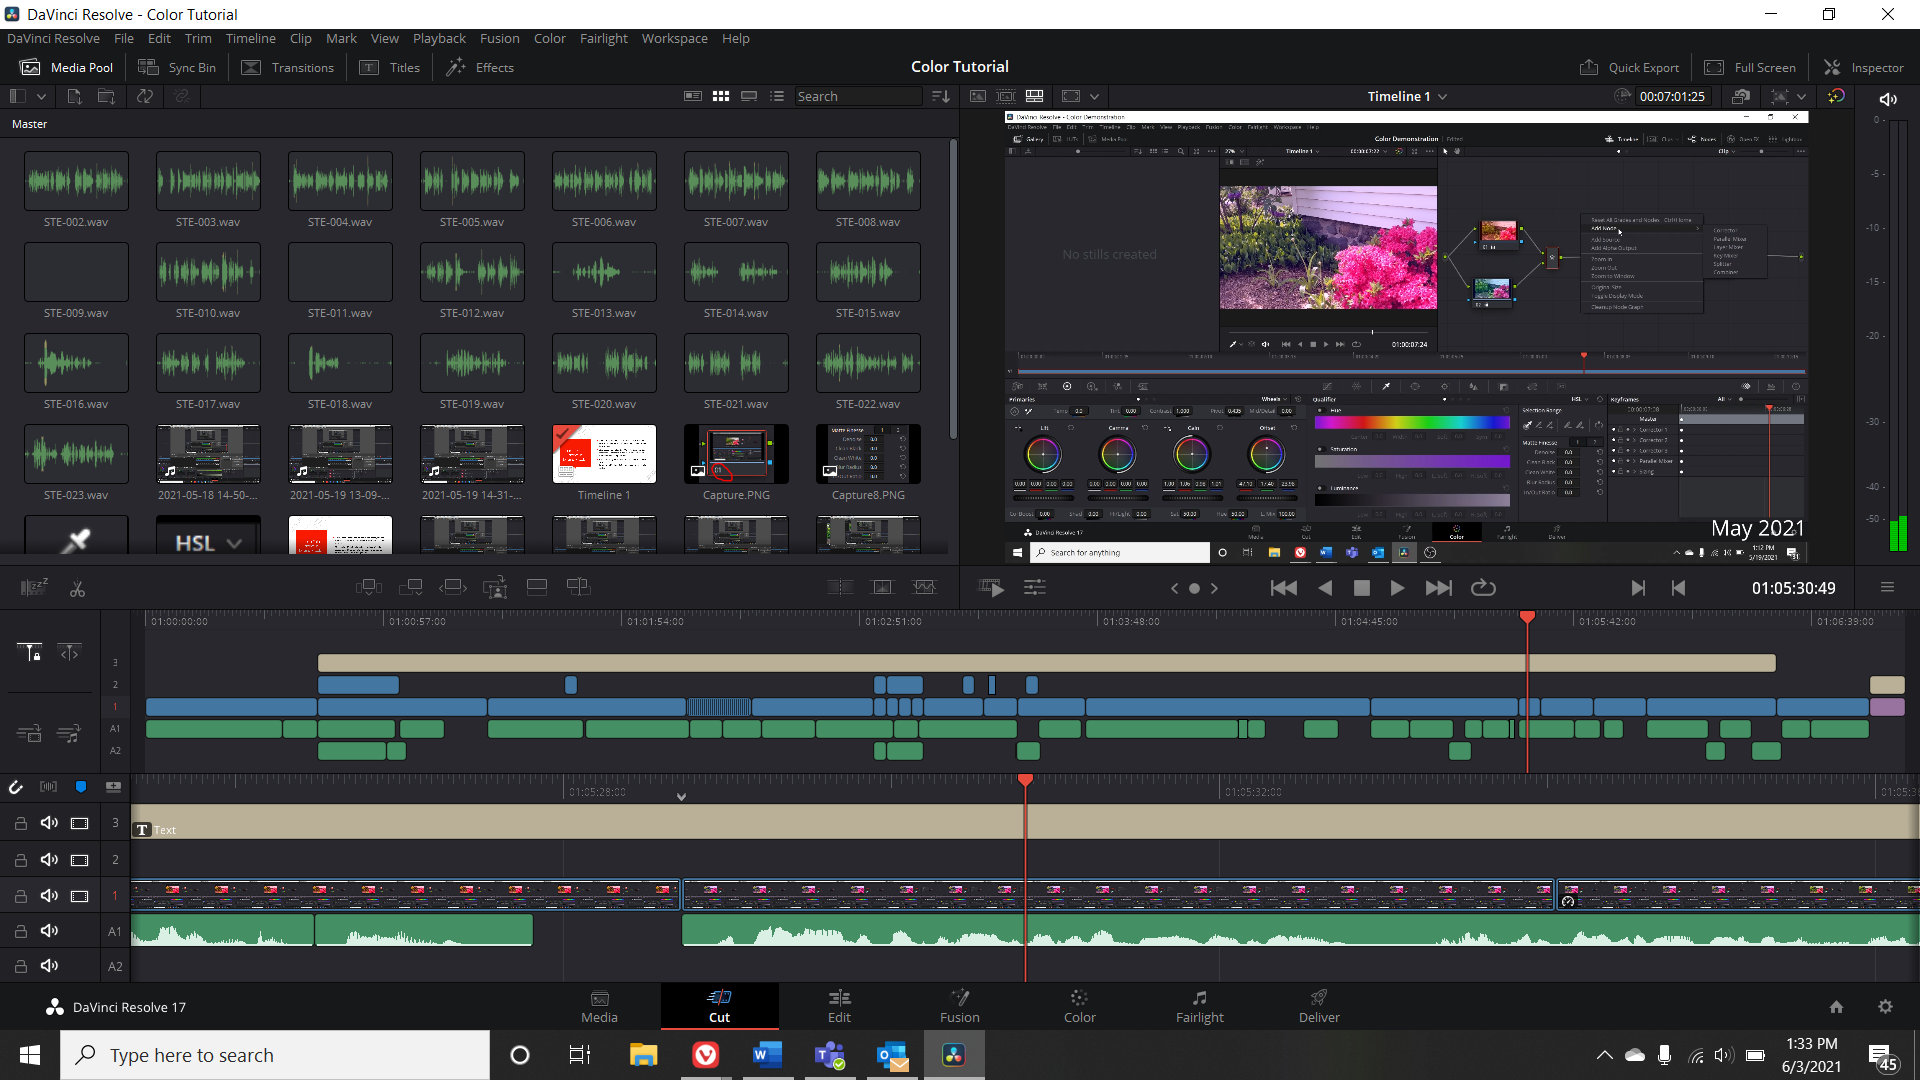
The Cut Menu is an interesting addition to the editing process. While you are able to cut your clips in the next menu (the edit menu), the cut menu has a specific view that allows you to focus in on a specific spot you want to cut. This is set up like an old school film cutting machine where the cutting line is fixed in the center and the clip is moved from left to right. This view is best suited for trimming down your clips to the length you want them to be before moving onto more complicated edits.
Edit Menu
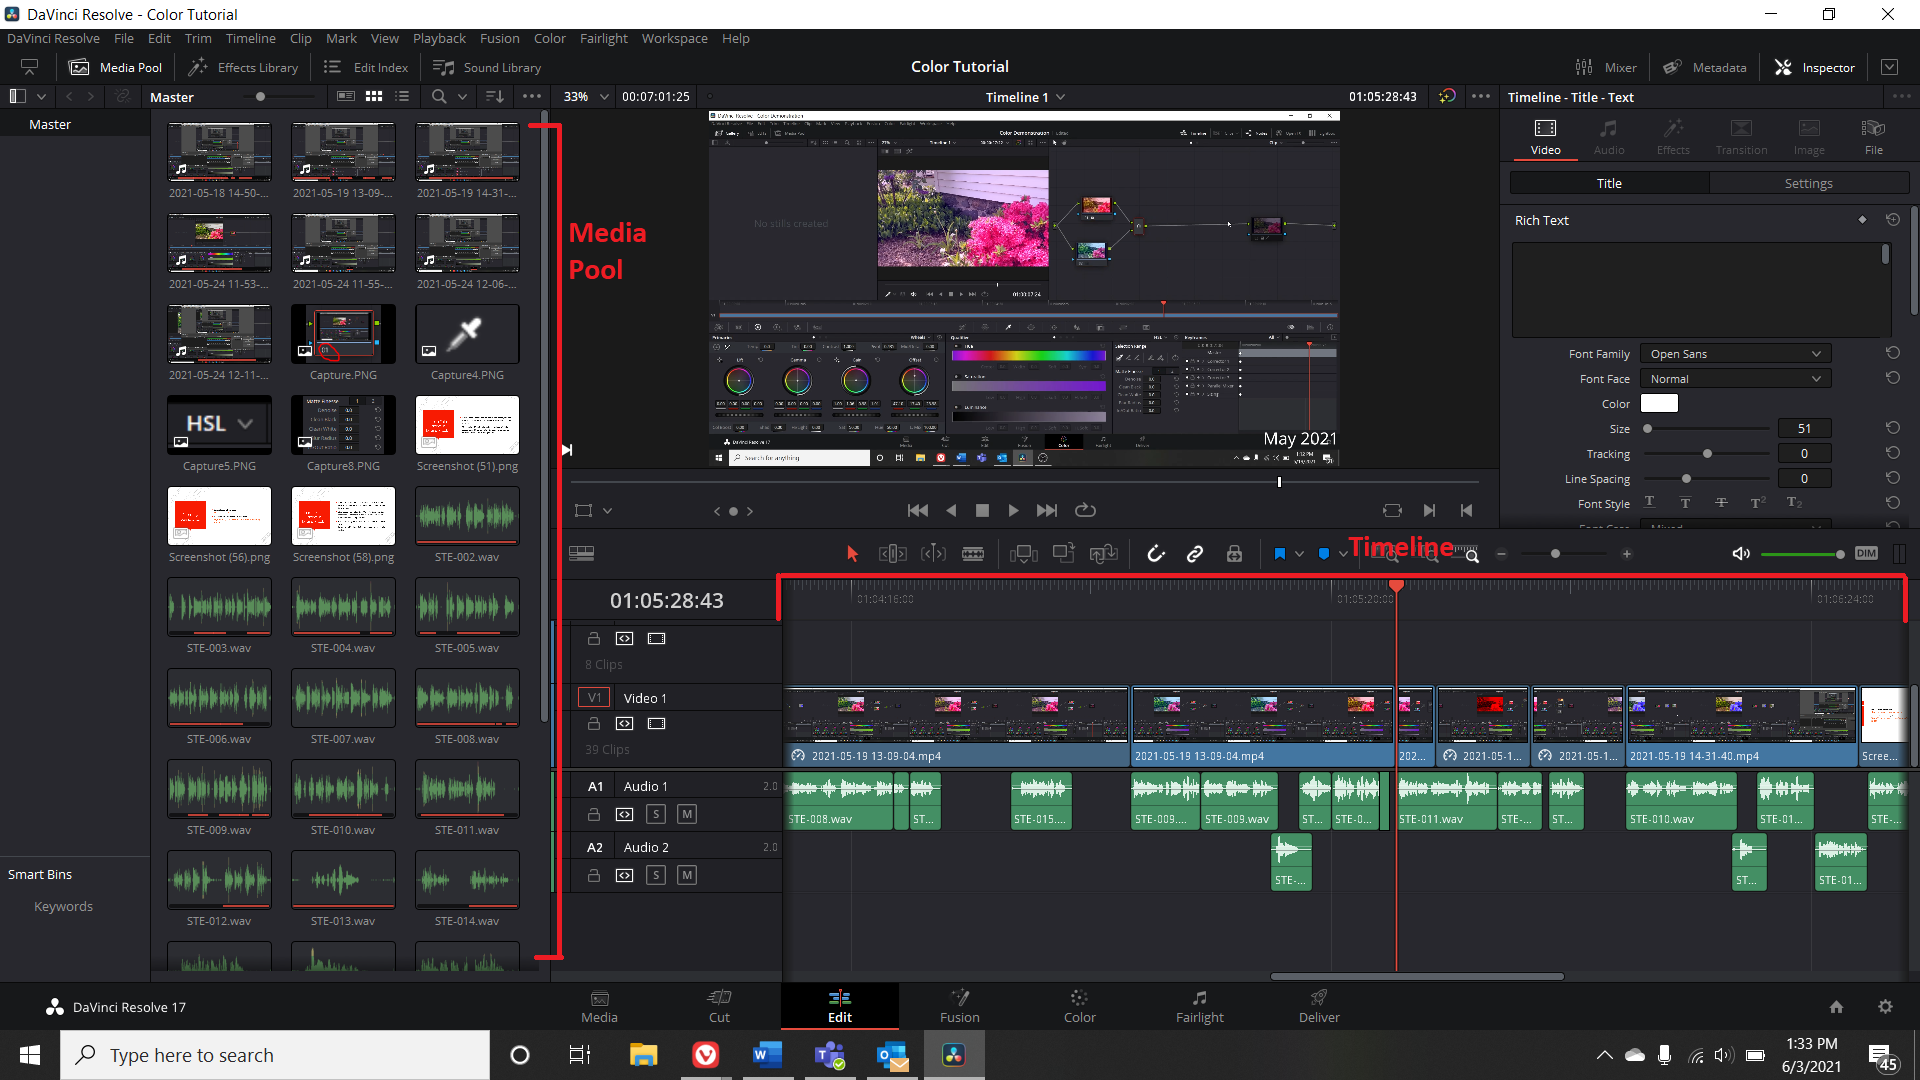
The Edit Menu is the menu that is most similar to other video editing programs. The interface has multiple audio and video tracks, and more can be added by right-clicking. By default, the timeline is on the bottom, the timeline preview is on top, and the media library is to the left.
Fusion Menu
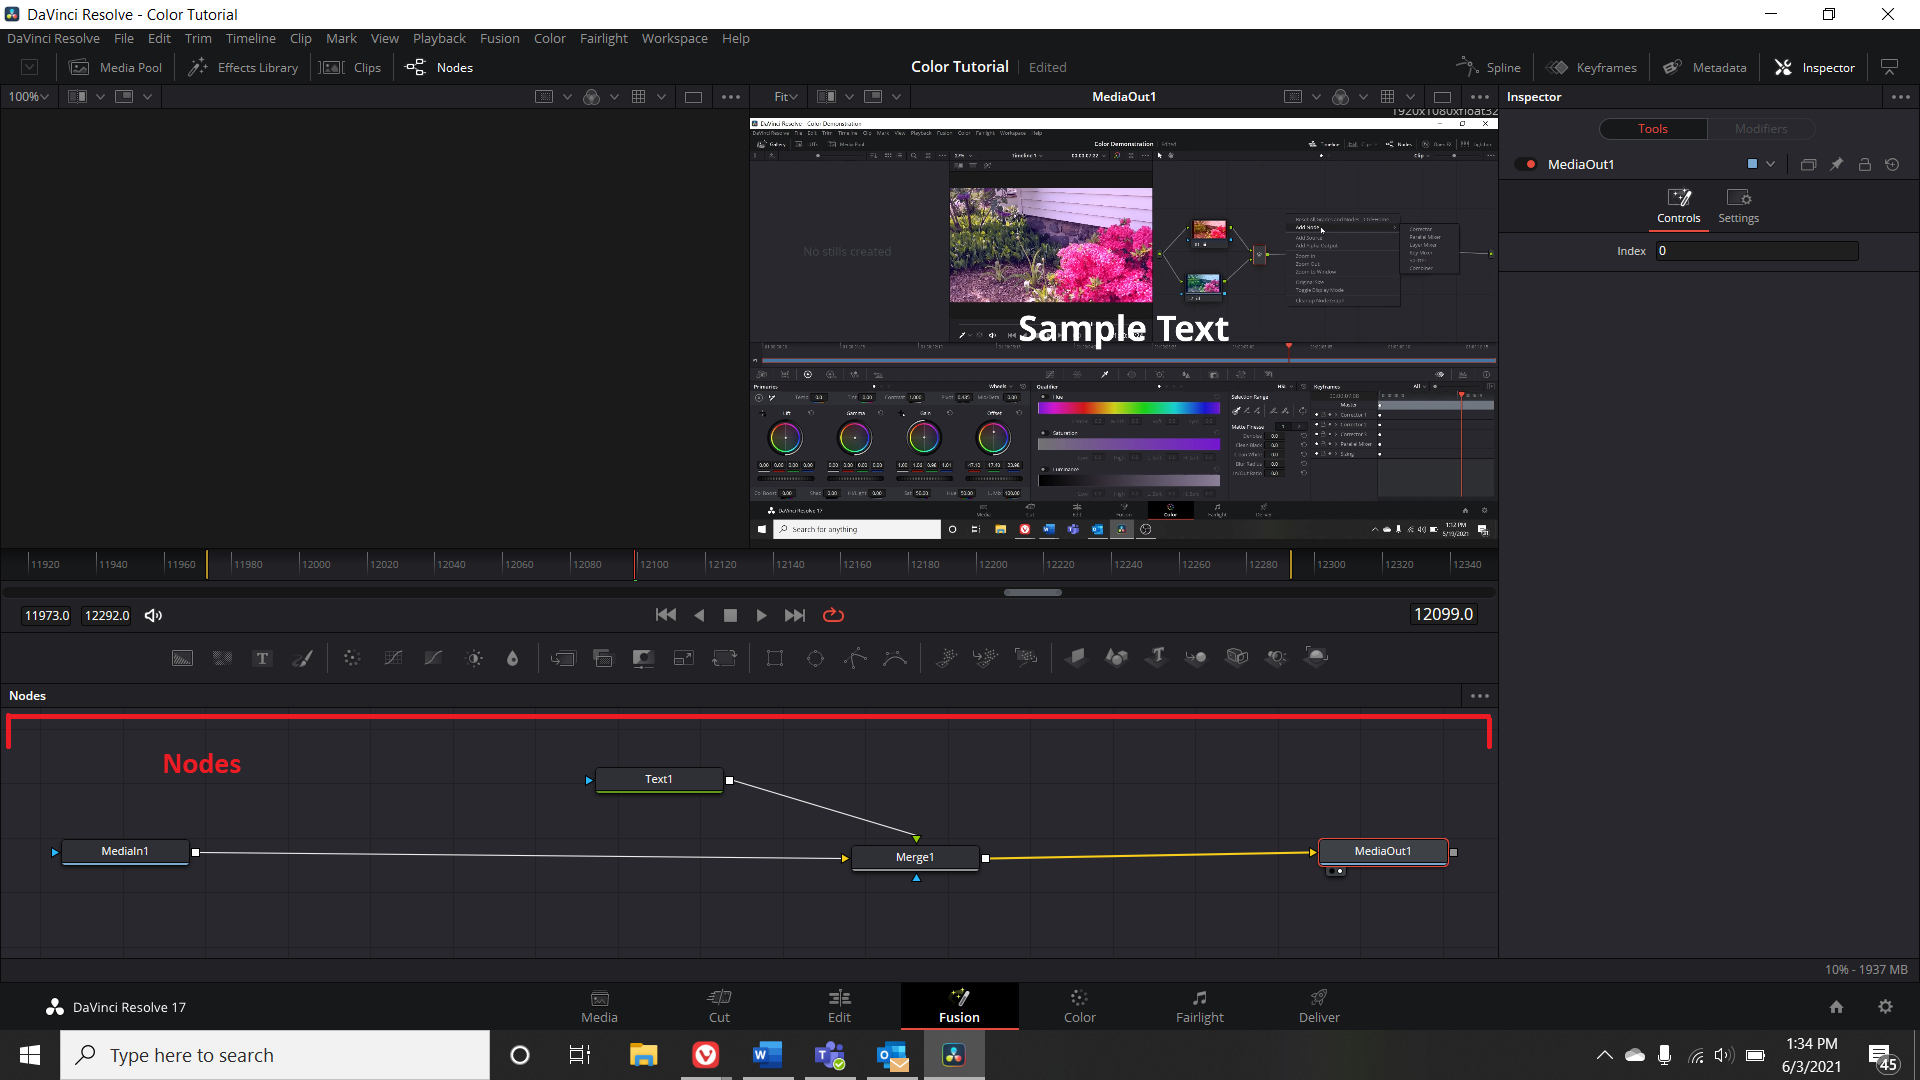
Fusion is Resolve’s interpretation of compositing and effects in the post-production process. In many video editing suites, the composites and effects would be applied directly to the timeline. Here, it’s on its own menu with its own interface and workflow to apply effects. The effects are applied by creating a chart with lines that connect to the in and out video points of the clip. You can add bubbles, called Nodes, to the chain of effects that represent text, noise, and other image transformations. Since this process may be unfamiliar to many, the Recording Studios has a video tutorial that explains how to use Fusion in more detail.
Color Menu
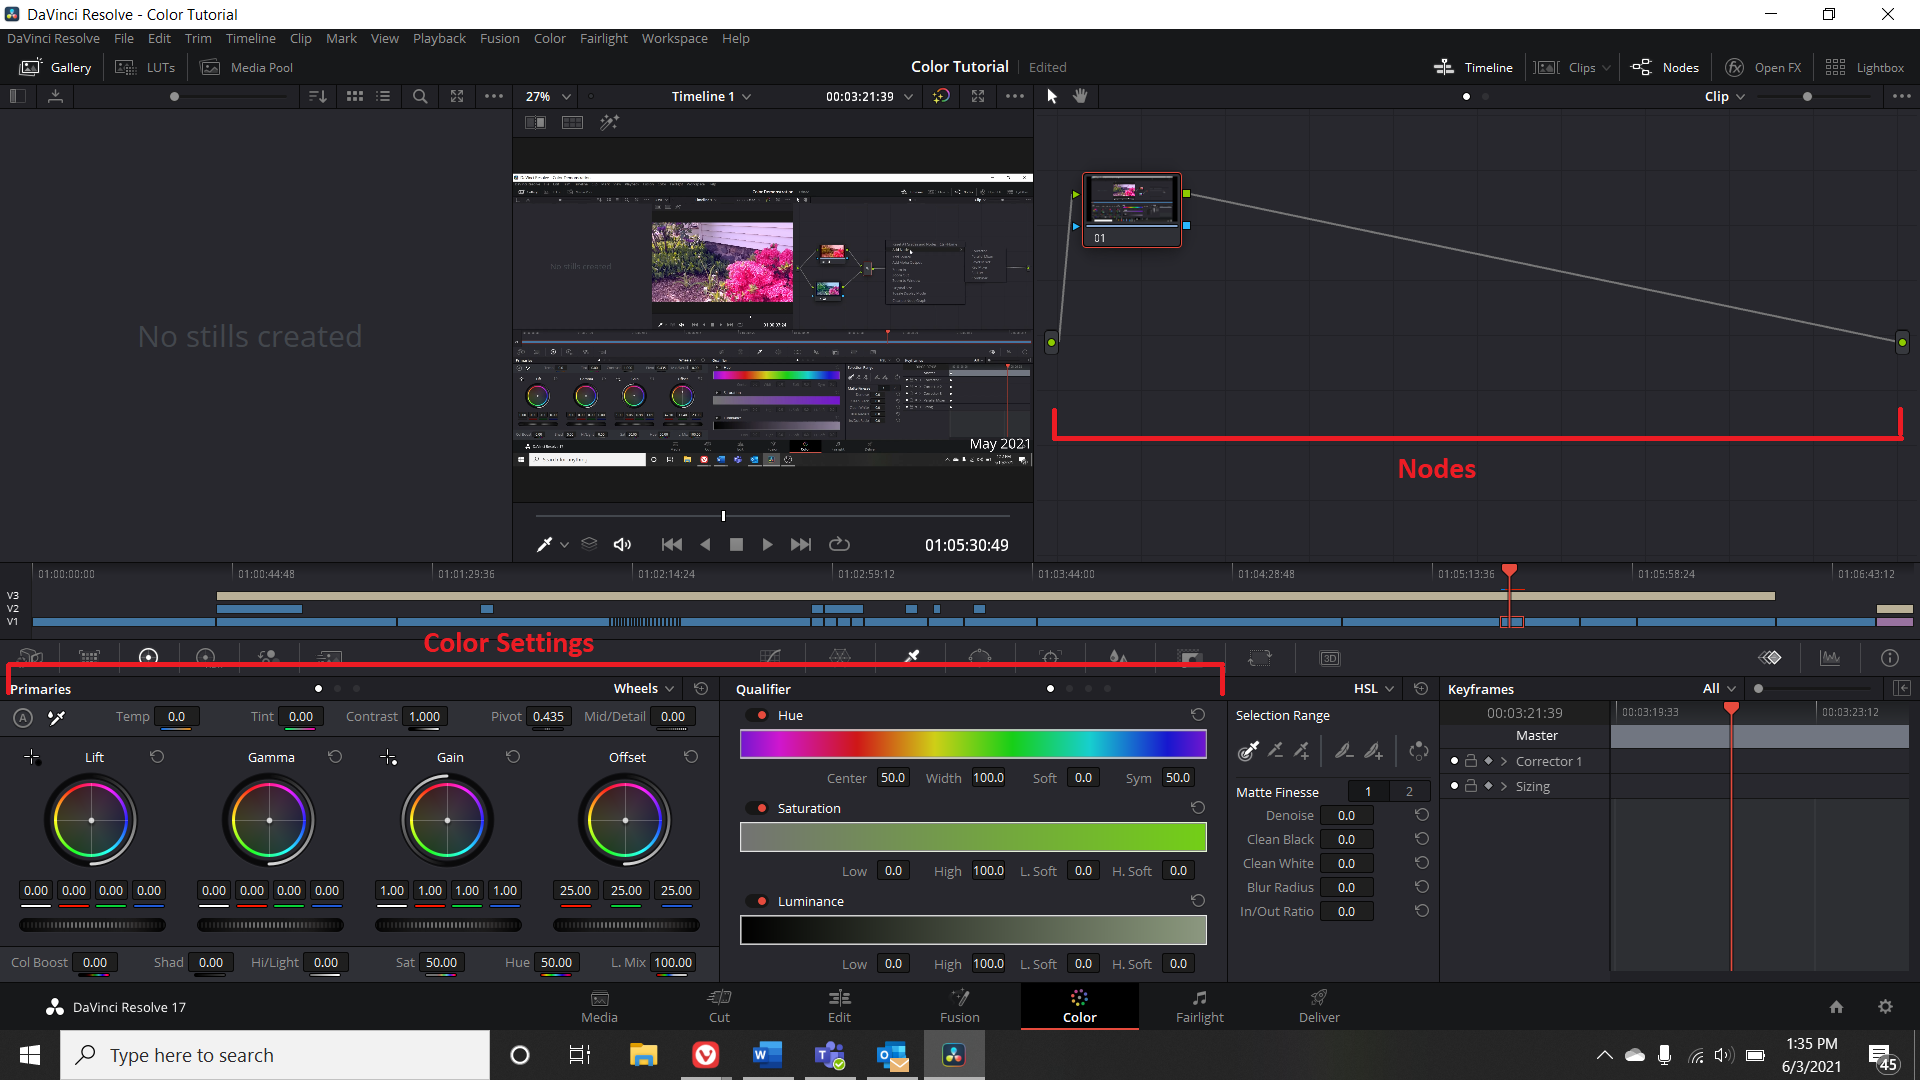
Like the Fusion Menu, the Color Menu also has a chart-and-node-based interface for applying effects. In this menu, the nodes panel is in the right side of the window by default instead of the bottom of the window. The bottom panel on the Color Menu contains several effects related to color correction, including wheels that tweak the values of different light and dark parts of the image, and a center channel that can be changed between multiple different menus, including color curves, windows, and qualifiers. There is a video tutorial on how to use the Color Menu.
Fairlight Menu
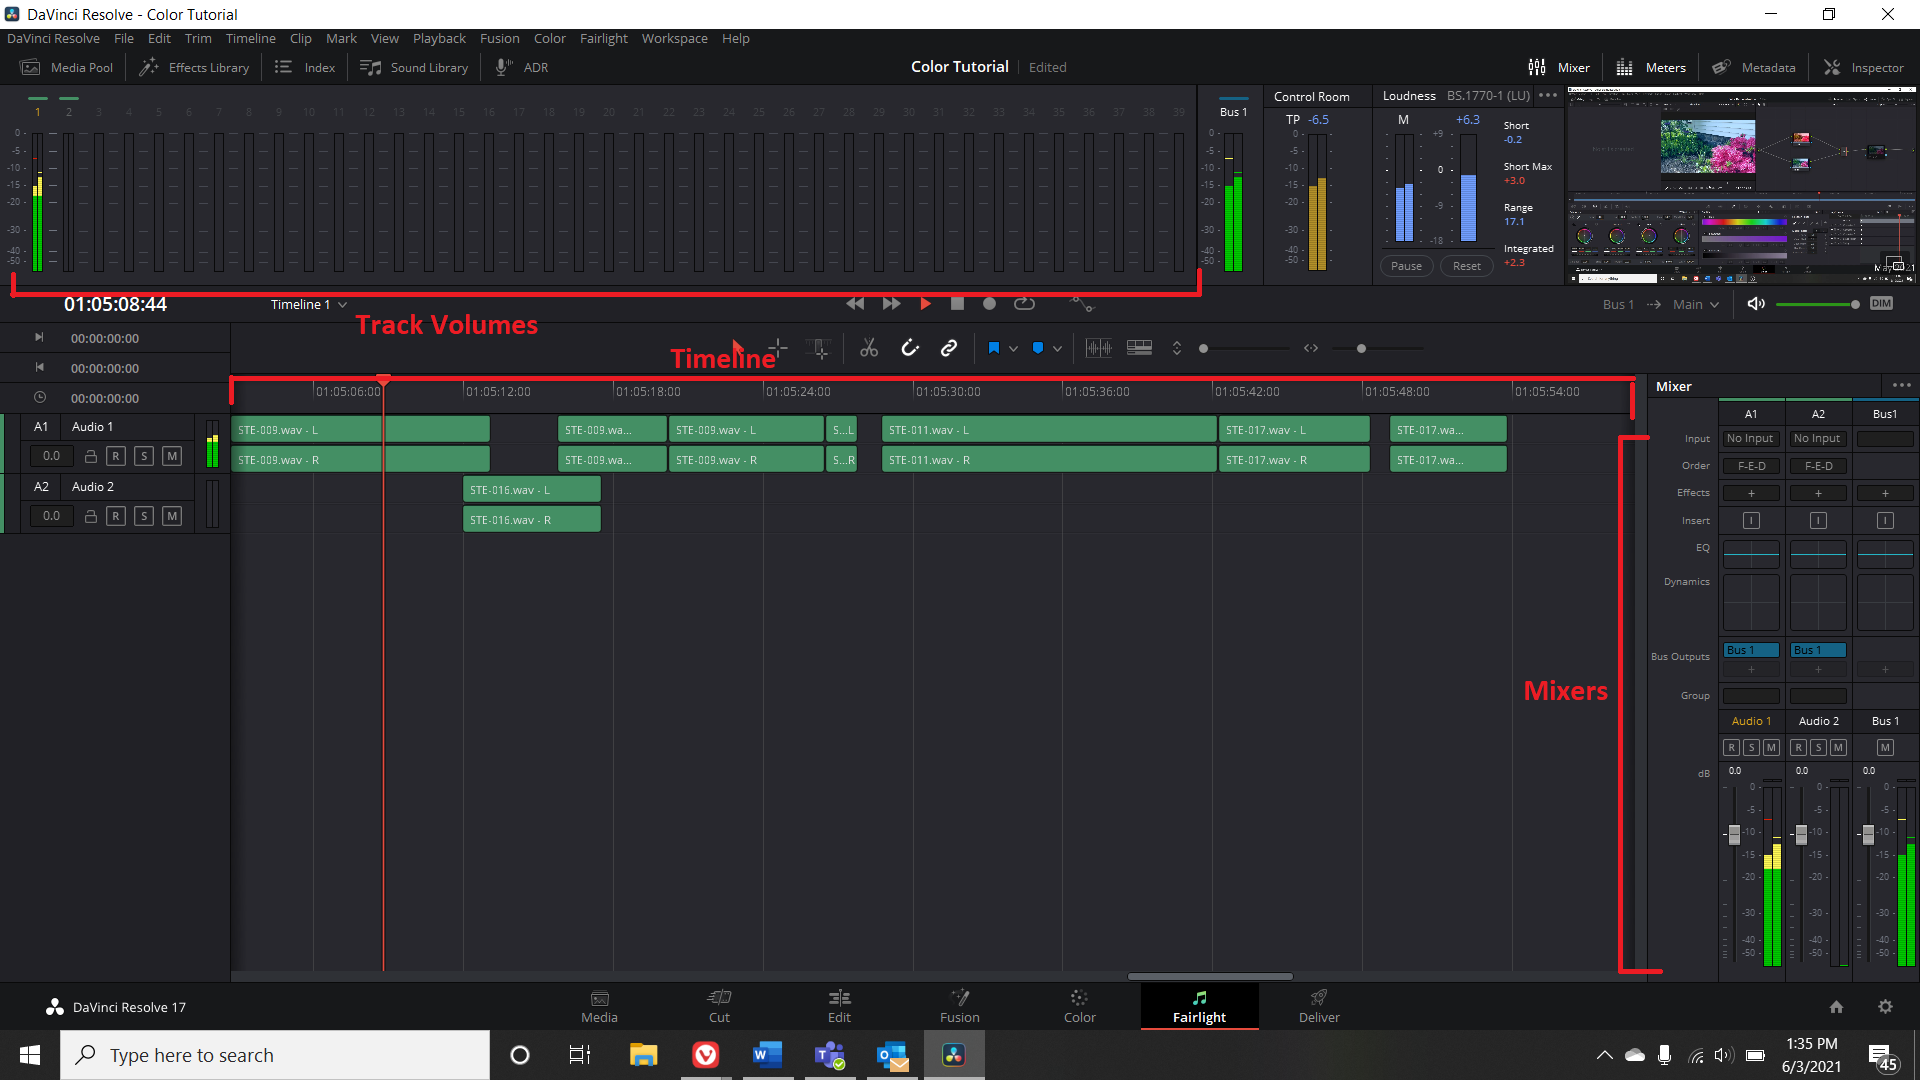
The Fairlight Menu is an in-depth sound mixing interface. At the top of the interface is a row of equalizer bars that displays up to 39 audio tracks at once, as well as control room and loudness levels. The bottom half of the interface displays a timeline of all the audio tracks so they can be trimmed and edited, and the right side of the interface has mixers for the output audio.
Deliver Menu
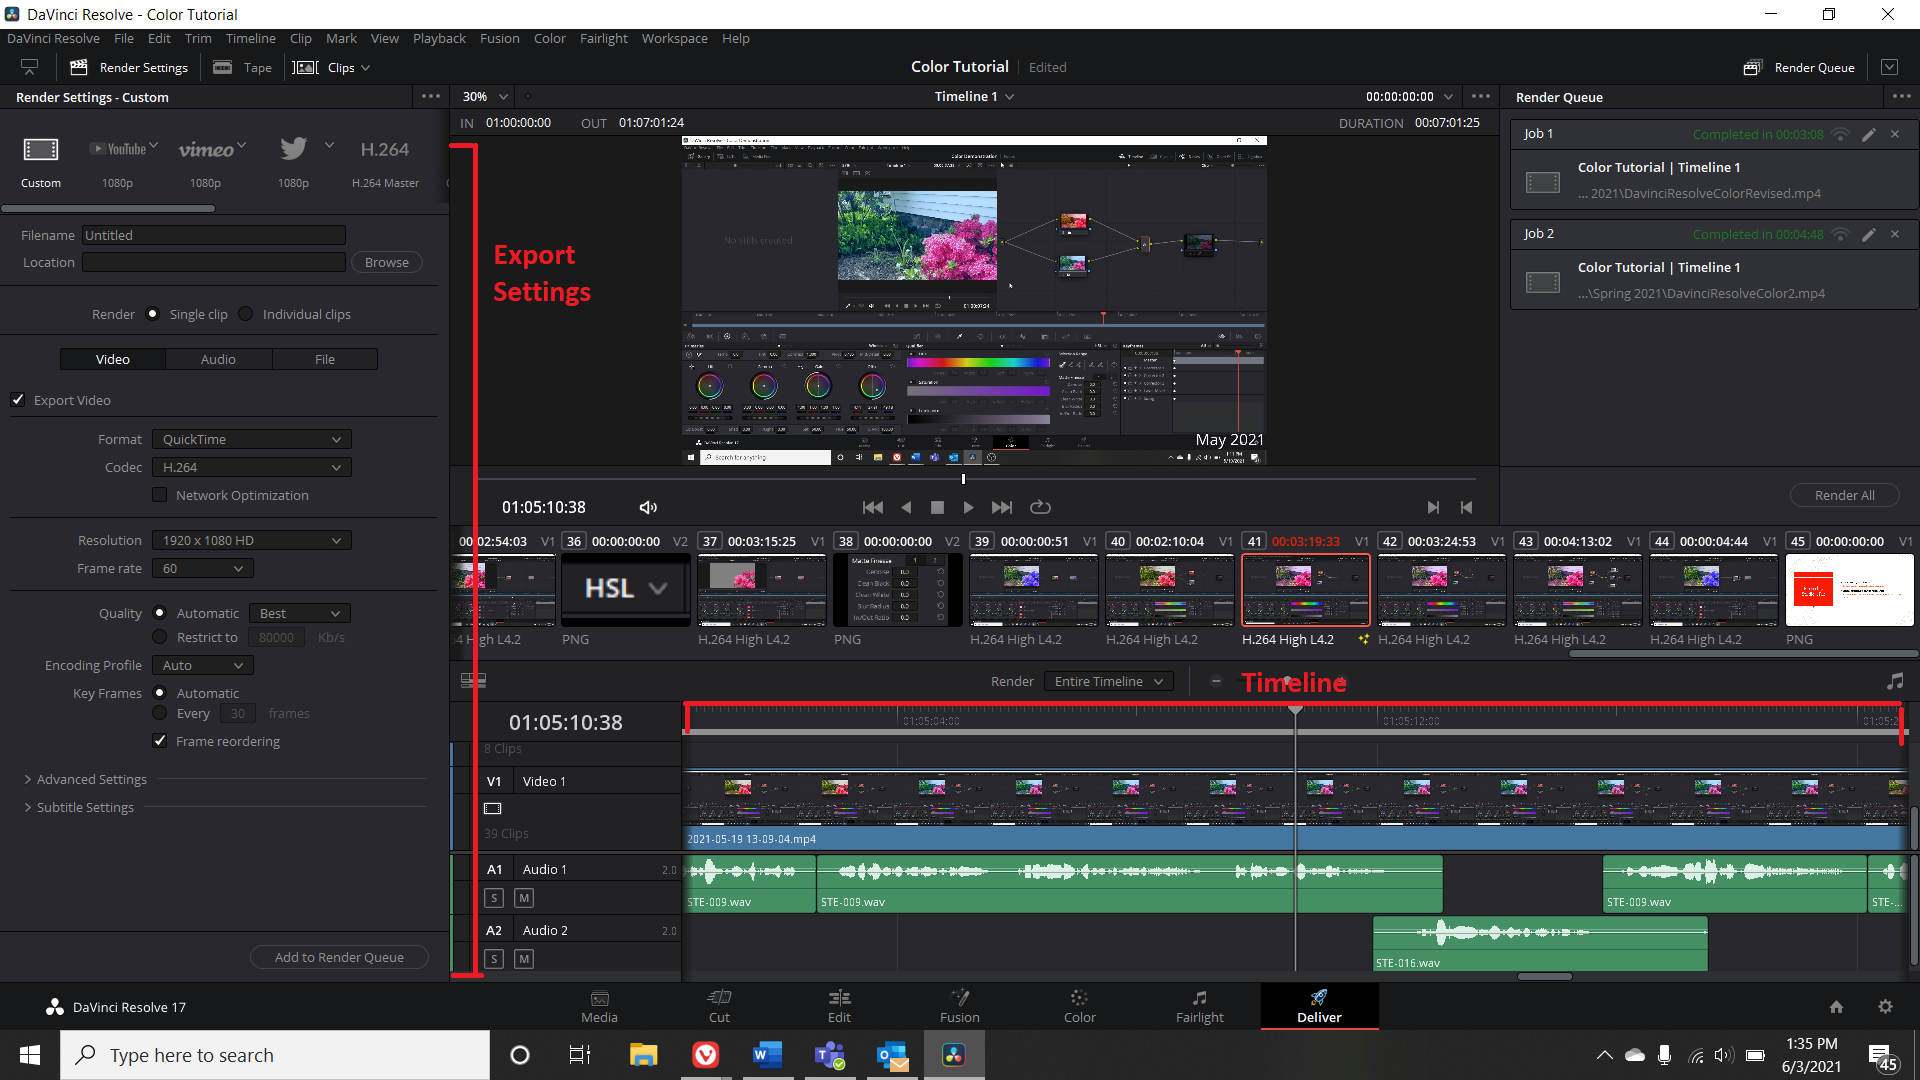
Deliver is the final stage of post-production, in which you select the settings that best optimize the project for export to a video file. It provides a timeline view to make any last minute changes to the project, as well as a view above that of all the clips that you have added to the timeline. You can click on any of these clips and it will take you to the part of the timeline where that clip is located. On the left side of the Deliver Menu is the export settings. You can choose from a number of different presets that fit commonly used website formats, or make a custom choice of the format, resolution, and directory. After selecting those, you add the project to the render queue on the right side of the window, then select “render all” to start exporting your projects.
Customizing Your Interfaces
While it may seem that the multiple interfaces offered by DaVinci Resolve offer little room to change what the interface looks like, there are many ways to customize the windows onscreen and make the view suit your needs. The easiest way to do this is to click on the “workspace” option on the top window bar, and hover over the option “show panel in workspace.” This shows a list of all the available windows in your view that you can turn on or off.
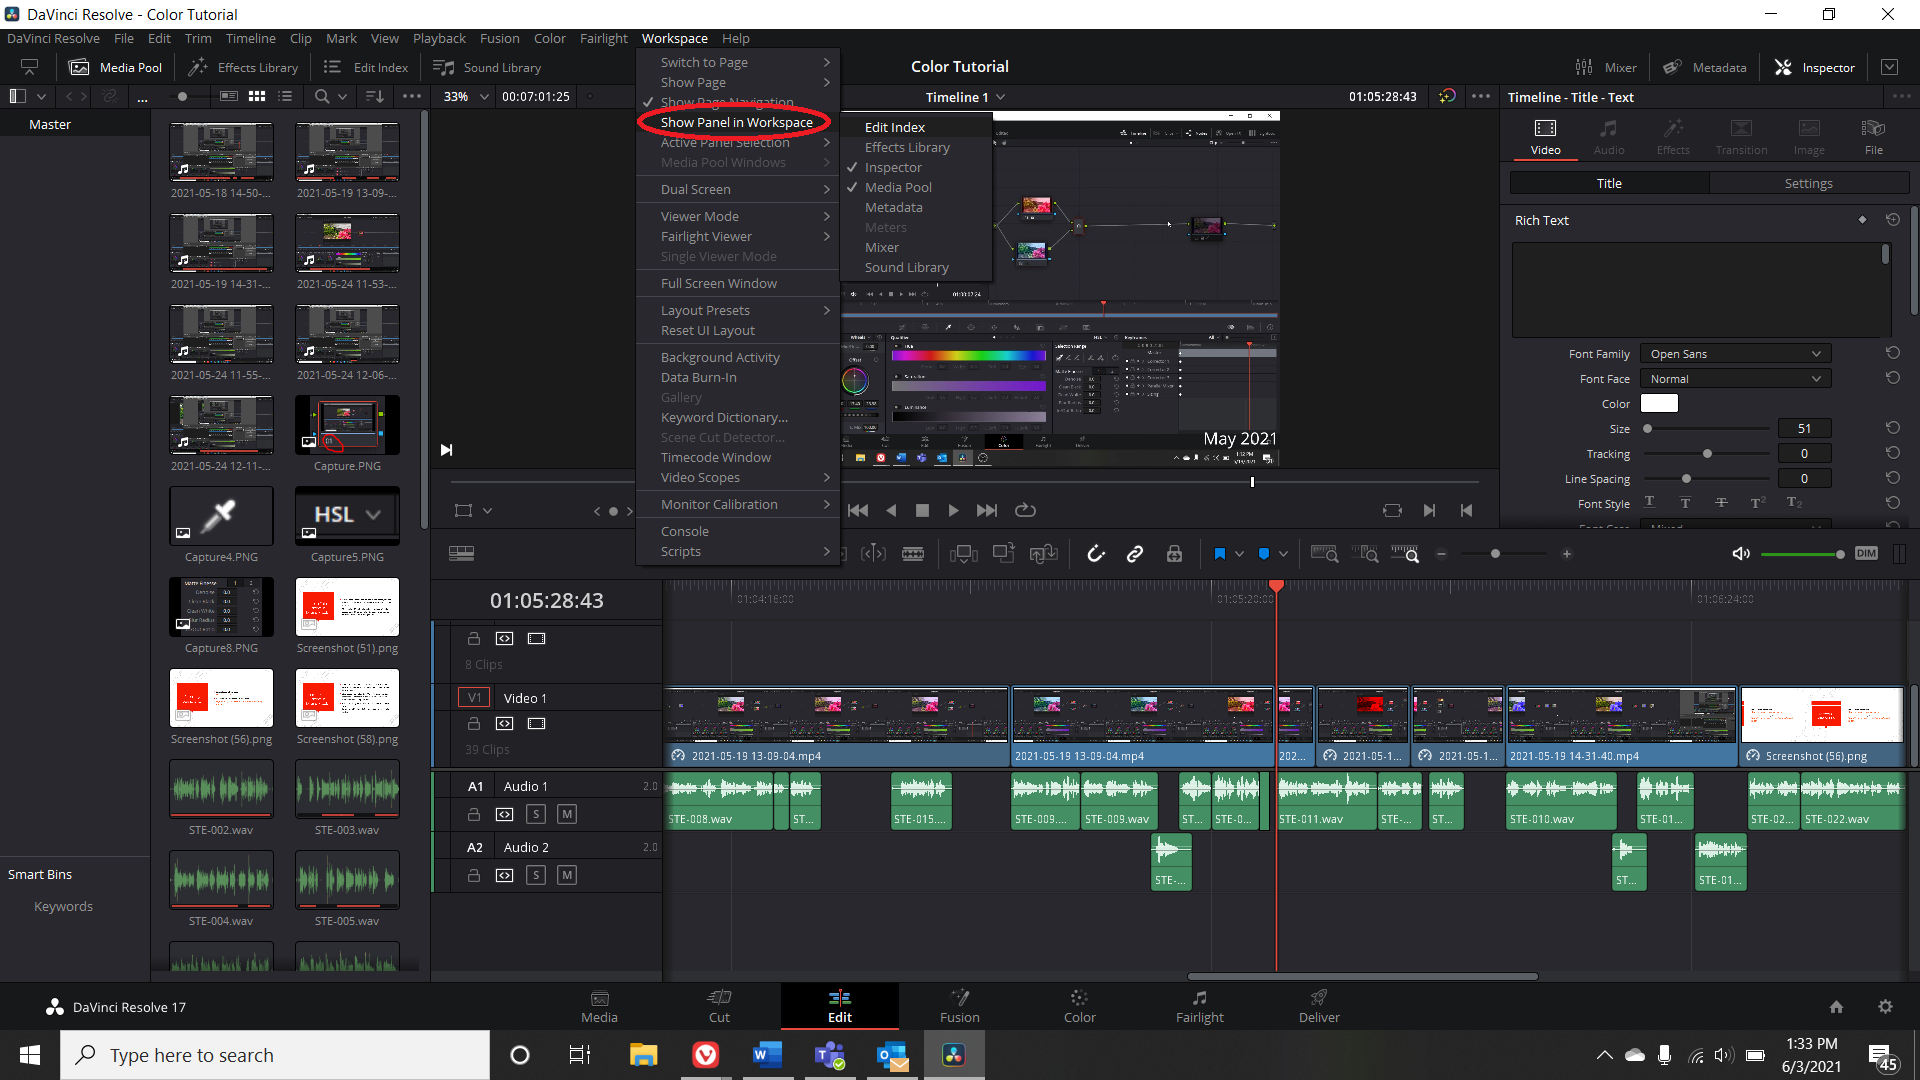
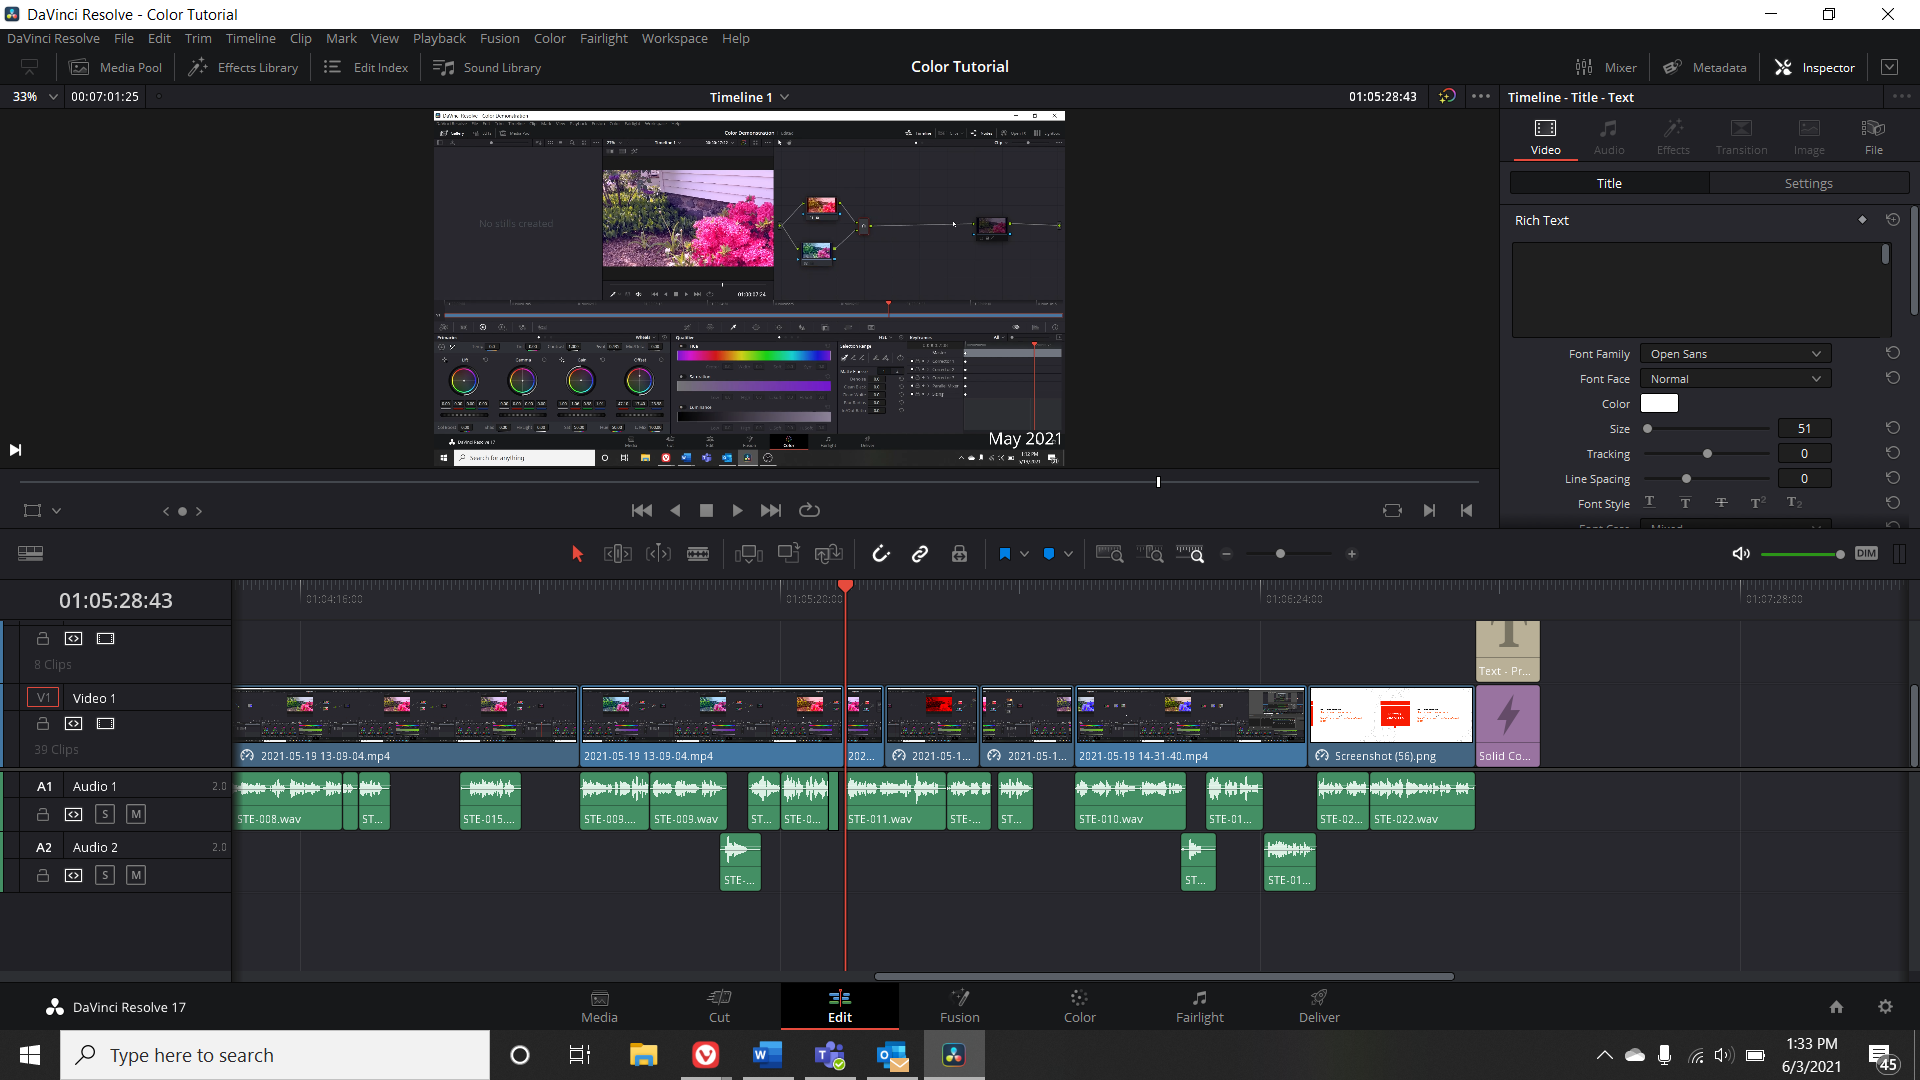
For example, in the media view, I may think I want more space for the timeline, and I am finished with dragging items from the media pool onto the timeline. I can uncheck Media Pool in the list of viewable workspace items, and that makes more room to use the timeline with.
You can also click and drag the margins of each window to scale its size relative to other windows. Unlike Adobe Premiere, Resolve does not offer the ability to pop out a portion of the view into its own window. For this reason, the user experience of DaVinci Resolve is greatly improved by using multiple monitors.
Conclusion
The biggest hurdle for new users of DaVinci Resolve to clear is the unfamiliar interfaces and understanding what the new interfaces are used for. Once you understand that each of the new interfaces reflect their own discrete stage of the editing process, you should get used to the workflow of DaVinci Resolve quickly. Hopefully, this tutorial is able to explain what each of the interface views allows you to do in building a cohesive video project.
Listen to the audio version of this tutorial here: